


Welcome to the official step-by-step guide, where we'll take you through the simple steps to acquire your Layer One X (L1X) coins.
If you've bought L1X coins during the Private Sale (through a Term Sheet), this guide will help you to claim your coins to your XWallet.
Prerequisite
Before we begin, make sure you have downloaded your XWallet from the Chrome Web Store and installed using this Guide. During the process. Ensure you copy down and secure your XWallet Public and Private Keys (also known as '‘addresses'’).
Note: If you have use multiple purchases using different email addresses, you have to claim individually for each email address. Simply repeat the process from Step 1.
Watch the full video here:
Please note that the steps are the same for claiming if you bought in Public Sale or Private Sale (through a Term Sheet) and that the screenshots may differ.
Become a proud owner of L1X coins and participate in the exciting Layer One X ecosystem.
Remember, as with any blockchain transaction, it is essential to stay vigilant and double-check all details to ensure a smooth and secure experience.
If you encounter any issue or have any questions during this process, don't hesitate to contact our support team at [email protected].
Now, let's get started:
Step 1. Access L1xApp to Claim your Coins
Begin by clicking on the following link to access the claim portal.
Step 2. Enter the email used to contribute to purchase L1X Coins

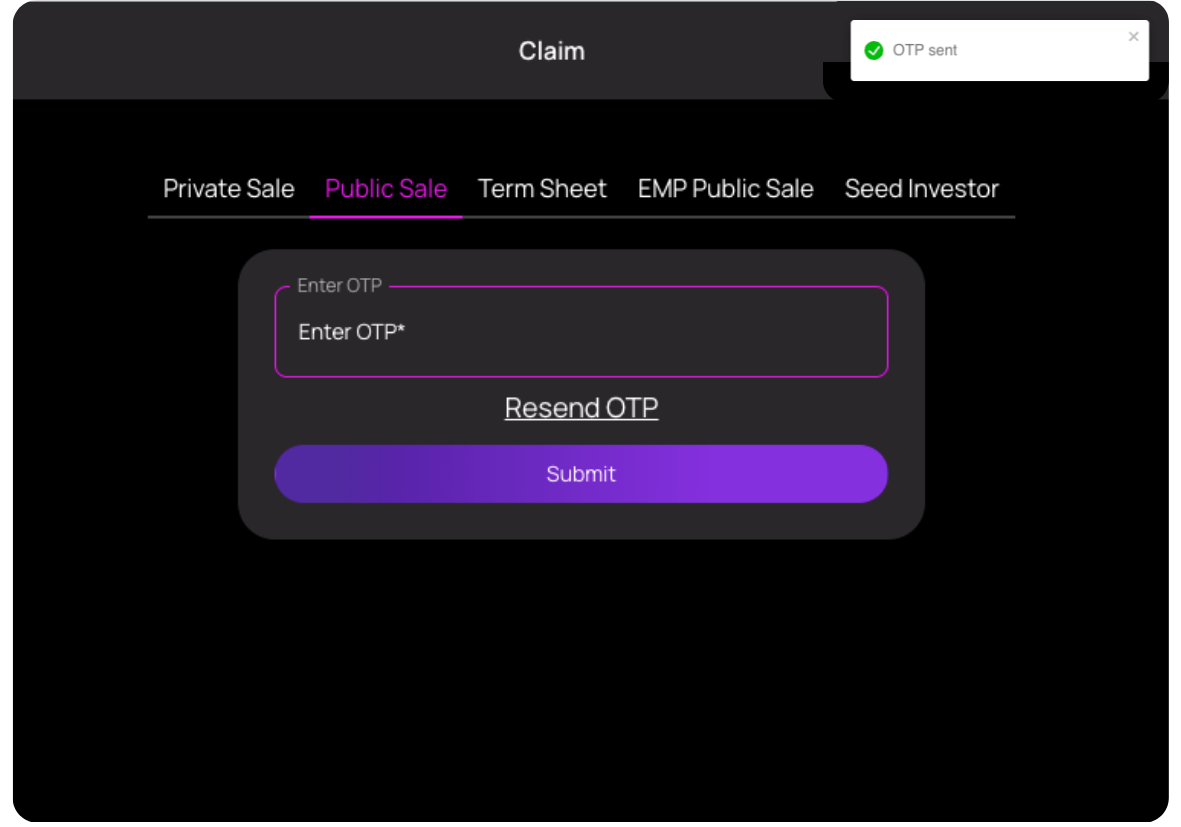
Step 3. Enter the OTP sent to your email
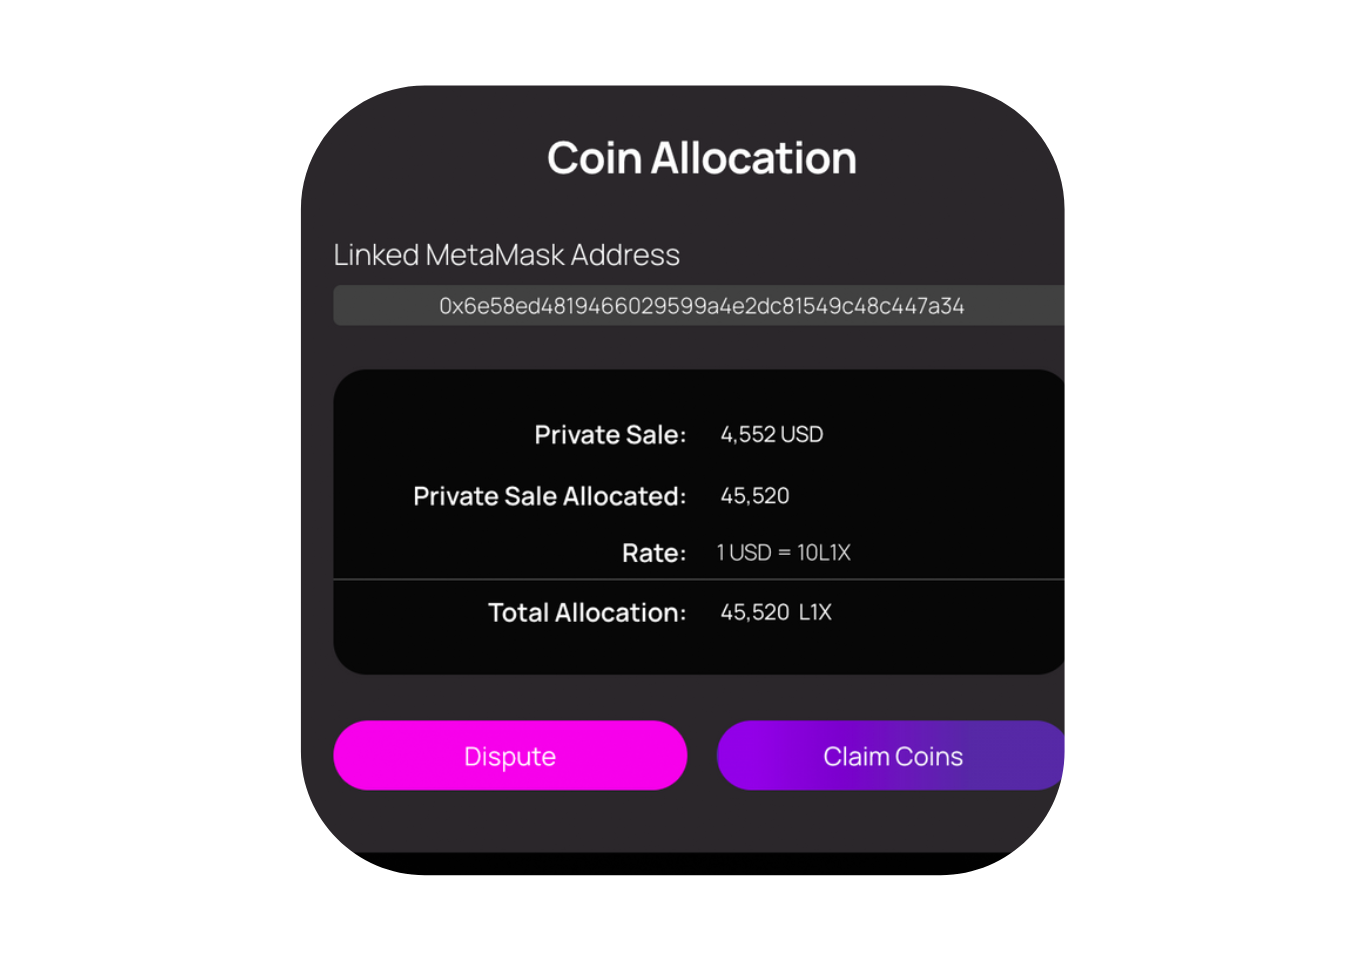
Step 4. Confirm Coin allocation
Verify the coin allocation details provided matches the amount you purchased before proceeding.
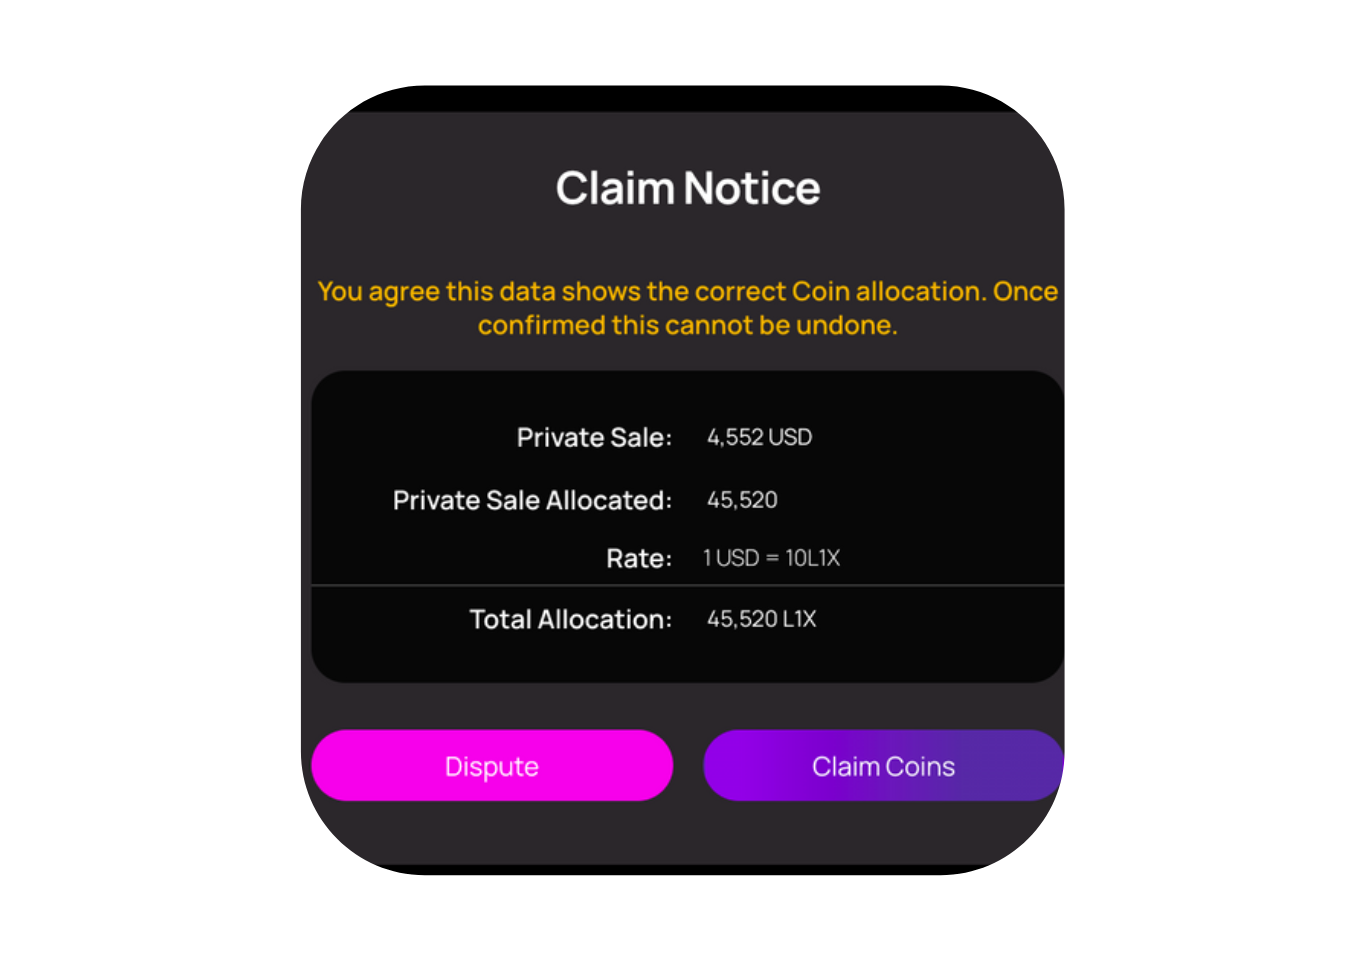
Step 5. Click on 'Claim Coins'
Now, click on the ’Claim Coins' button and acknowledge the yellow message that appears.
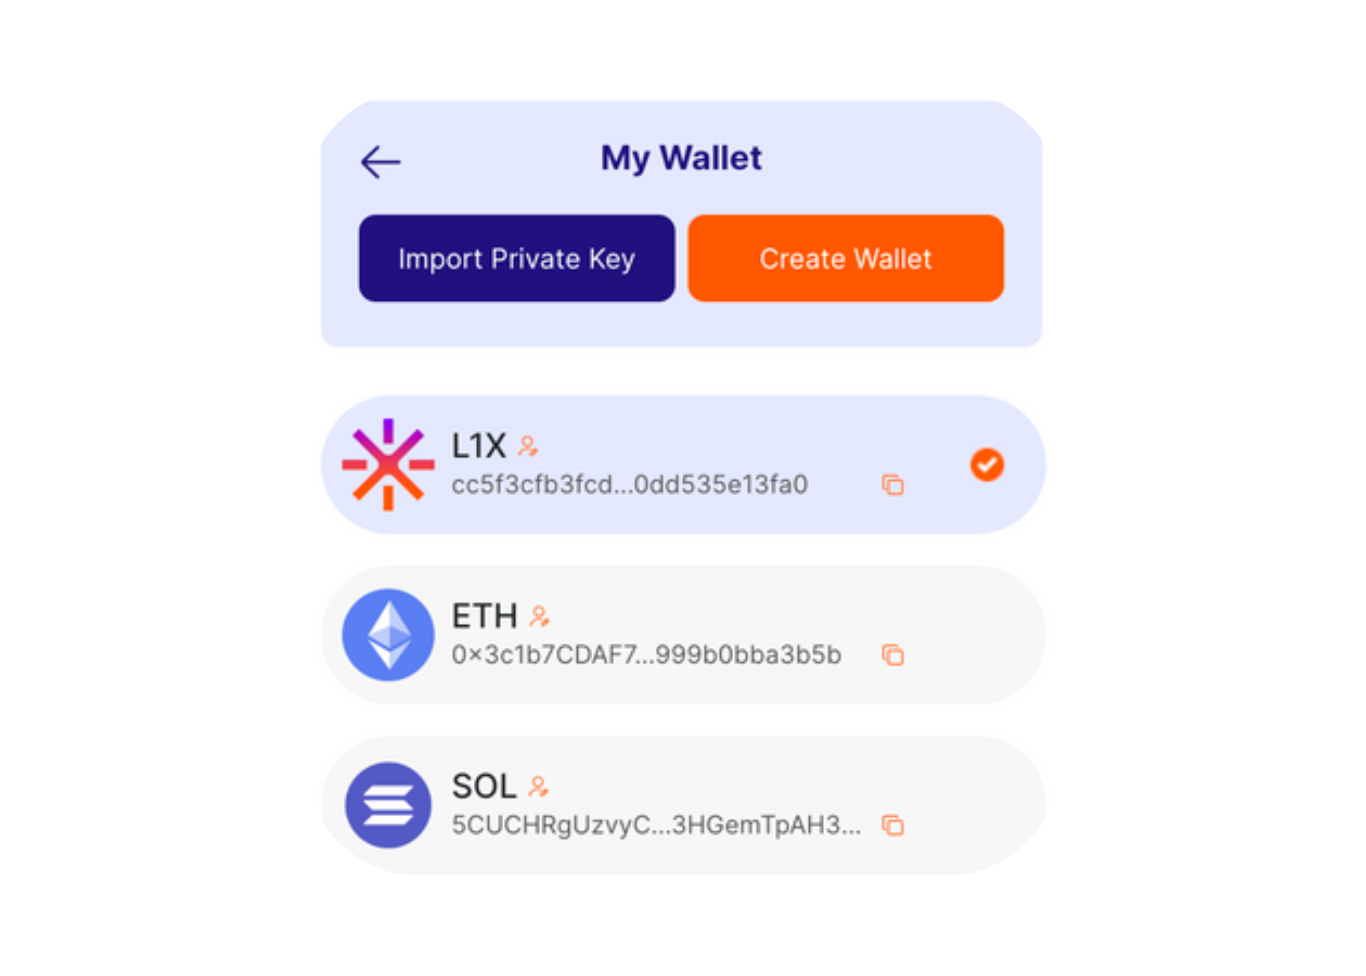
Step 6. Enter your XWallet address
You will be prompted to enter your XWallet address. Make sure this address (the ‘Public Key’) is the one generated during the ‘Prerequisite’ stage previously covered in this guide.
In the image below, simply click on the two small orange squares to copy your Public Key.
In case you missed how to generate your Xwallet address, click on the ‘See how to generate an L1X Wallet Address' option below ‘Claim’.
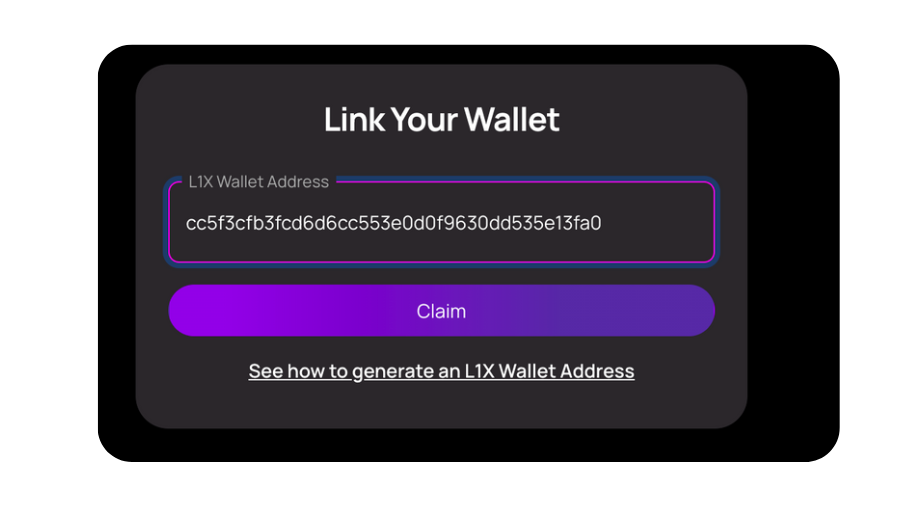
Step 7. Claim your coins
After entering your Xwallet address, click on the 'Claim' button. This action will initiate the coin claiming process, and your L1X Coins will be released to the address provided.

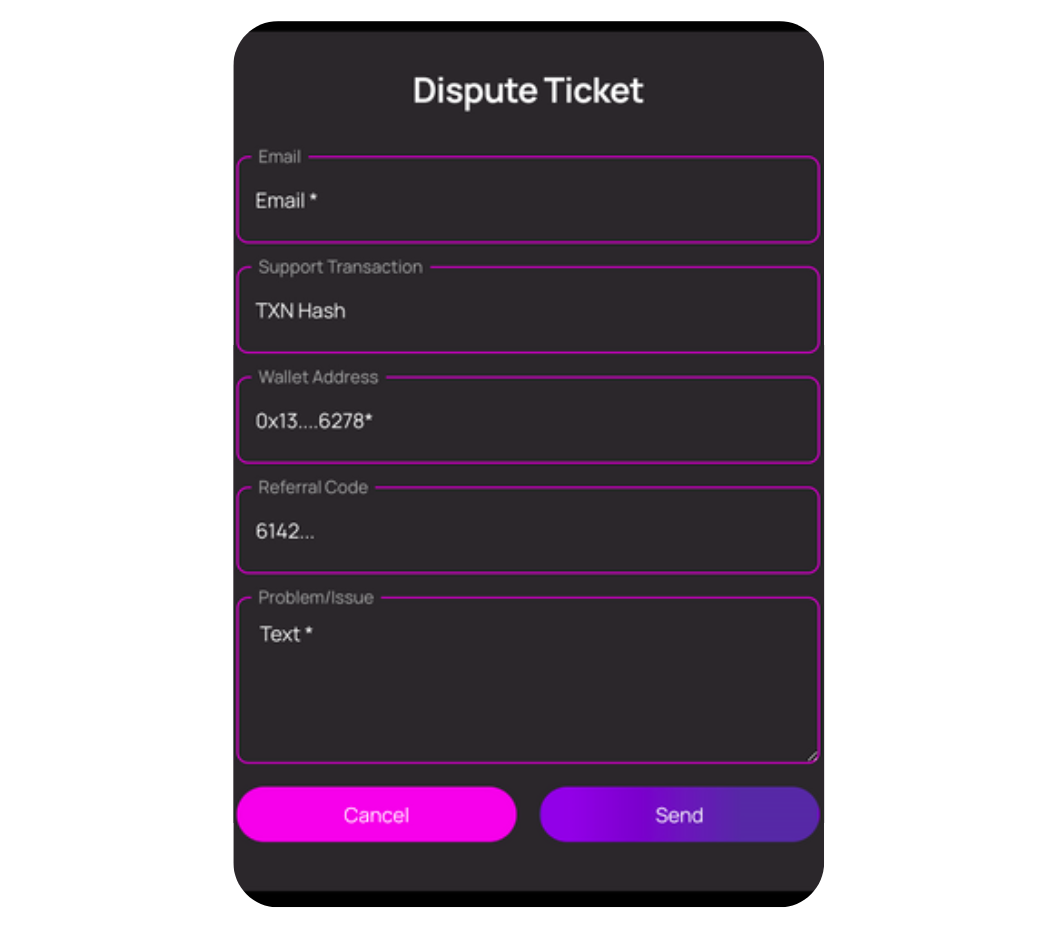
Step 8. Dispute resolution
If you notice that the coin allocation is incorrect or you encounter any issues during the claiming process, don't worry. L1X provides a dispute resolution system. Create a support ticket to address any problems by clicking on the 'Dispute button'.
Congratulations! You have successfully claimed your L1X Coins and will be able to start enjoying the benefits and opportunities that come with owning L1X Coins.


)