

Are you eager to claim your L1X Coins using the L1X App but don't know where to start? Look no further! This step-by-step guide will take you through the entire process, ensuring you can claim your Coins hassle-free.
Prerequisite
Before we begin, make sure you have downloaded your XWallet from the Chrome Web Store and installed using this Guide. Ensure you copy your XWallet Public and Private Keys (also known as 'addresses').
Note: If you have made multiple purchases using different email addresses, you have to claim individually for each email address or MM Wallet.
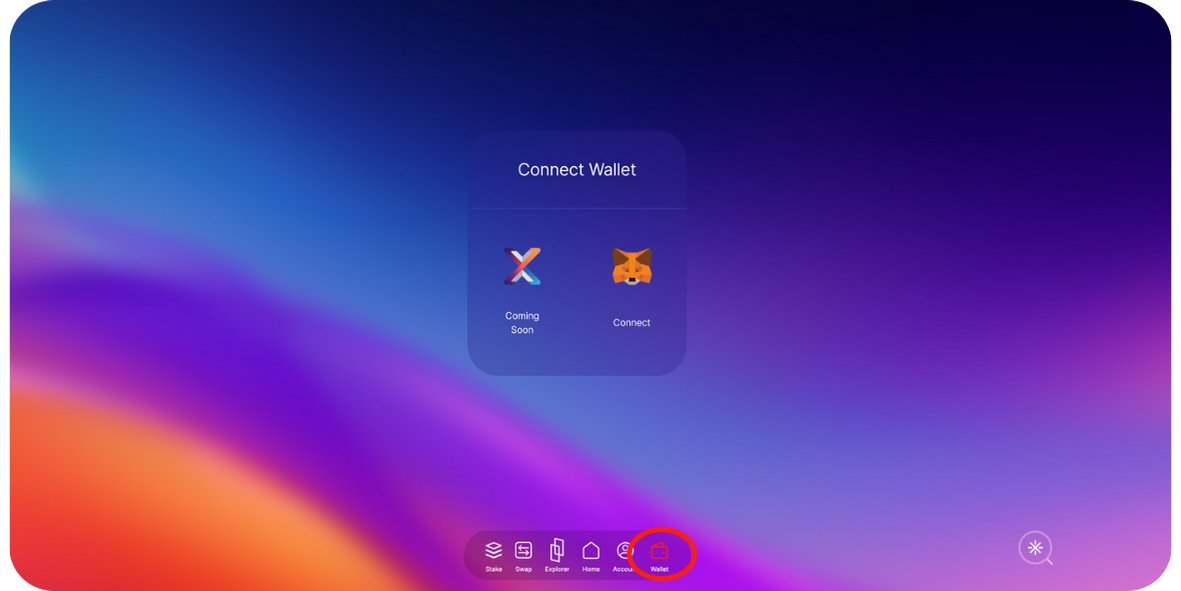
Step 1. Access L1X App and connect your Wallet
- Go to L1X APP
- Click on the wallet icon in the Dock.
- Connect MetaMask with your preferred Address.
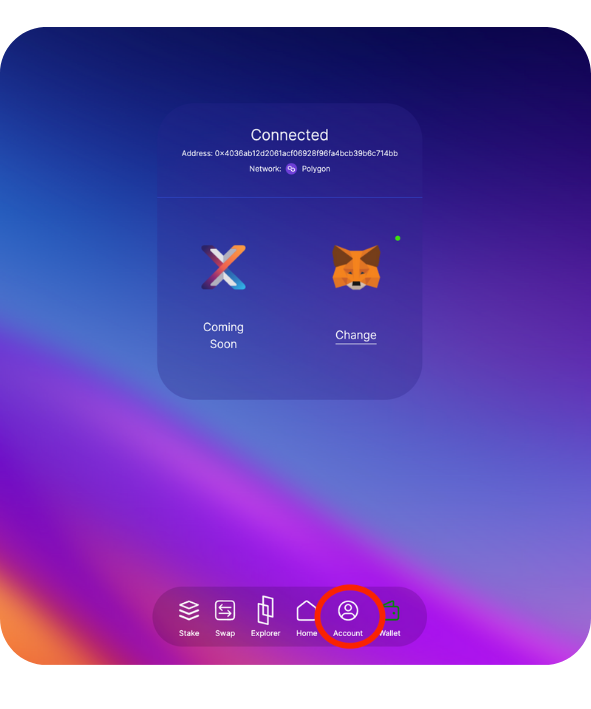
Step 2: Access the Claim Section
- Click on the Account icon in the Dock.
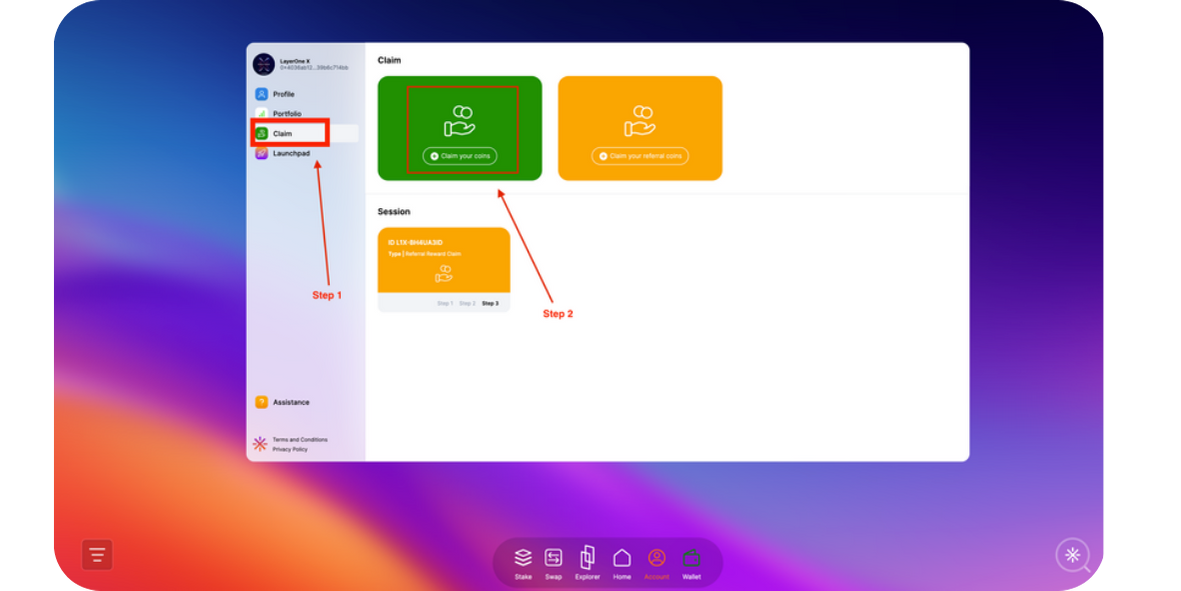
Step 3: Initiate the Claim Process
- Select 'Claim' and then choose 'Claim your Coins'.
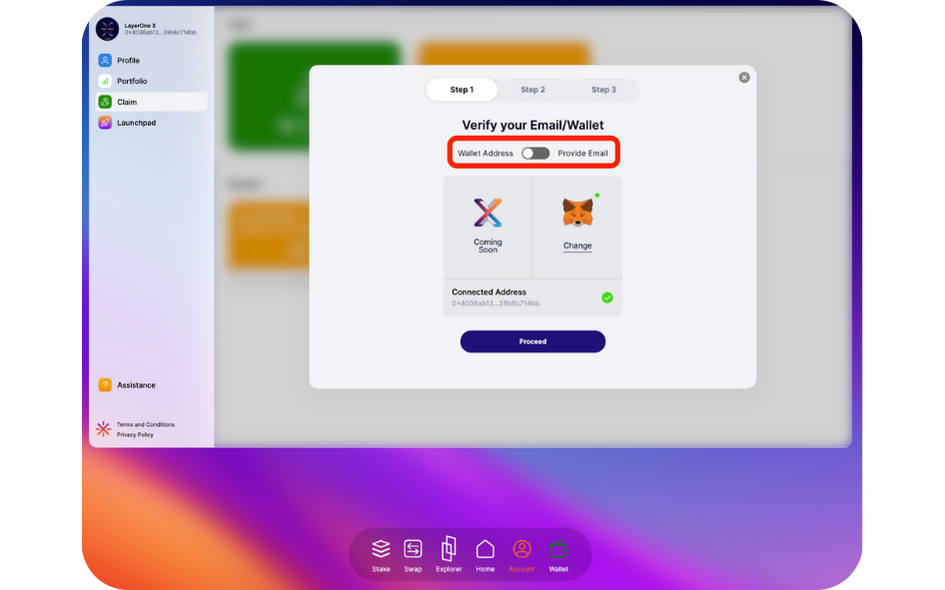
Step 4: Choose Your Contribution Type
- Select your option per contribution type by clicking on the toggle button. You'll need to provide either a wallet address or an email address depending on your contribution.
- L1X Private Sale - Wallet Address
- EMP Public Sale - Wallet Address
- EMP Private Sale - Wallet Address
- Contest rewards - Provide Wallet Address
- L1X Public Sale - Provide Email
- Term Sheet - Provide Email
- Seed - Provide Email
You will need to wait to be verified before click 'Proceed'.
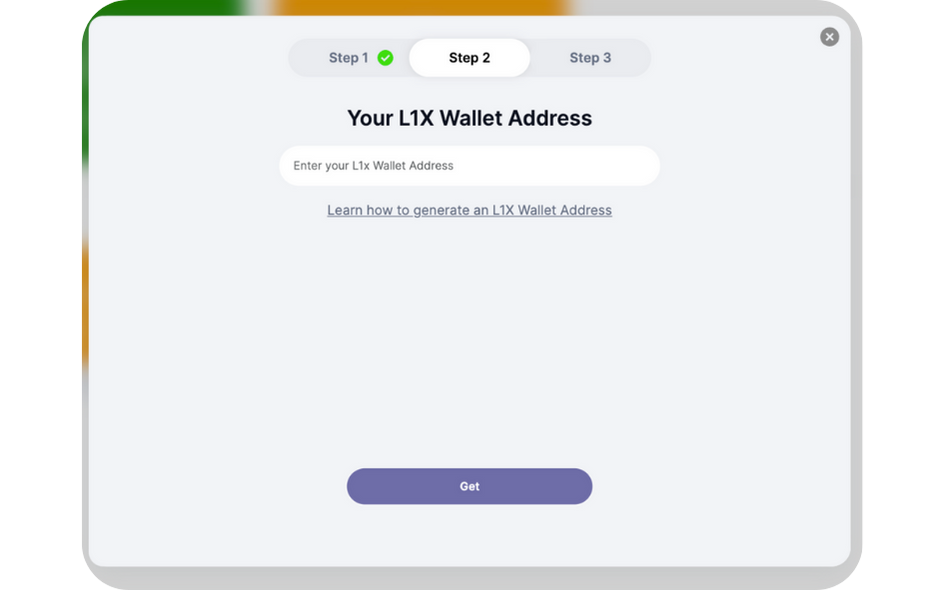
Step 4.1: Verify through L1X Wallet Address
- Enter your L1X Wallet address where the Coins should be deposited and click 'Get'.
- You will have to wait to be verified.
Step 4.2: Verify through Email
- Enter the email used to purchase your Coins.
- Click 'Send Code'.
- You will receive a One Time Password (OTP) on the verified email.
- Type the provided OTP and wait to be verified.
Step 5: Verify Contributions and Allocated Coins
- Verify your contributions and allocated Coins.
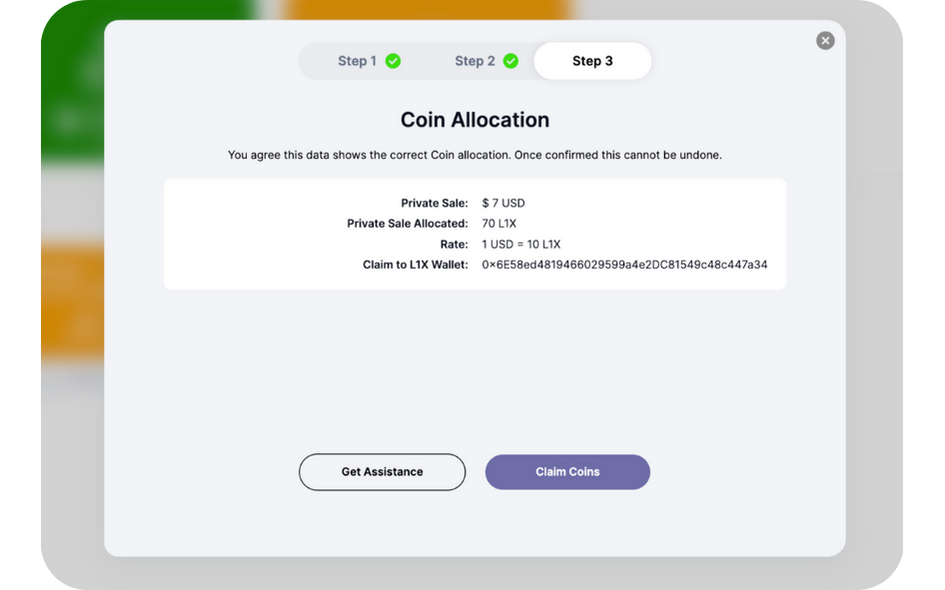
Step 6: Claim Your Coins
- Click the 'Claim Coins' button to initiate the transfer.
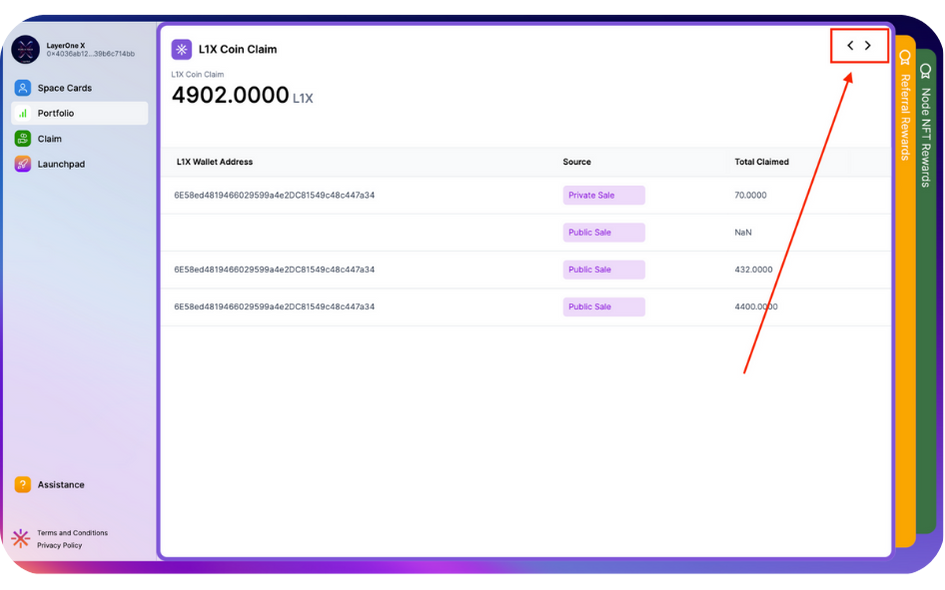
Step 7: Check Your Portfolio
- Once the transfer is completed, you can see the claimed Coins under the portfolio section.
Congratulations! You've successfully claimed your L1X Coins using the L1X APP. If you have referrals and want to know how to claim them , be sure to check out our blog HERE.
Happy claiming!


