

Welcome to our comprehensive step-by-step guide on how to install your very own XWallet!
For a smooth process, you can watch the full video here:
Step 1. Locate the XWallet extension for Chrome
Access the Chrome Store and select the 'Add to Chrome' button to initiate the installation.

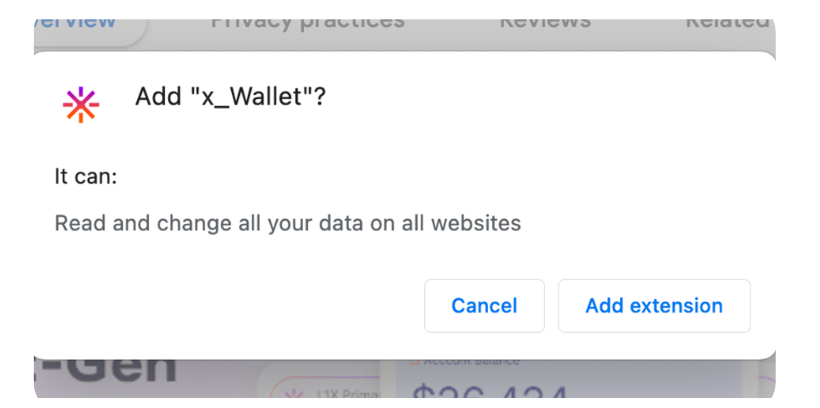
Step 2. Install the Chrome Extension
A pop-up will appear asking you to confirm the extension installation. Click on ’Add extension’ to proceed.
Step 3. Confirmation
You will receive a confirmation message once the extension is successfully added.

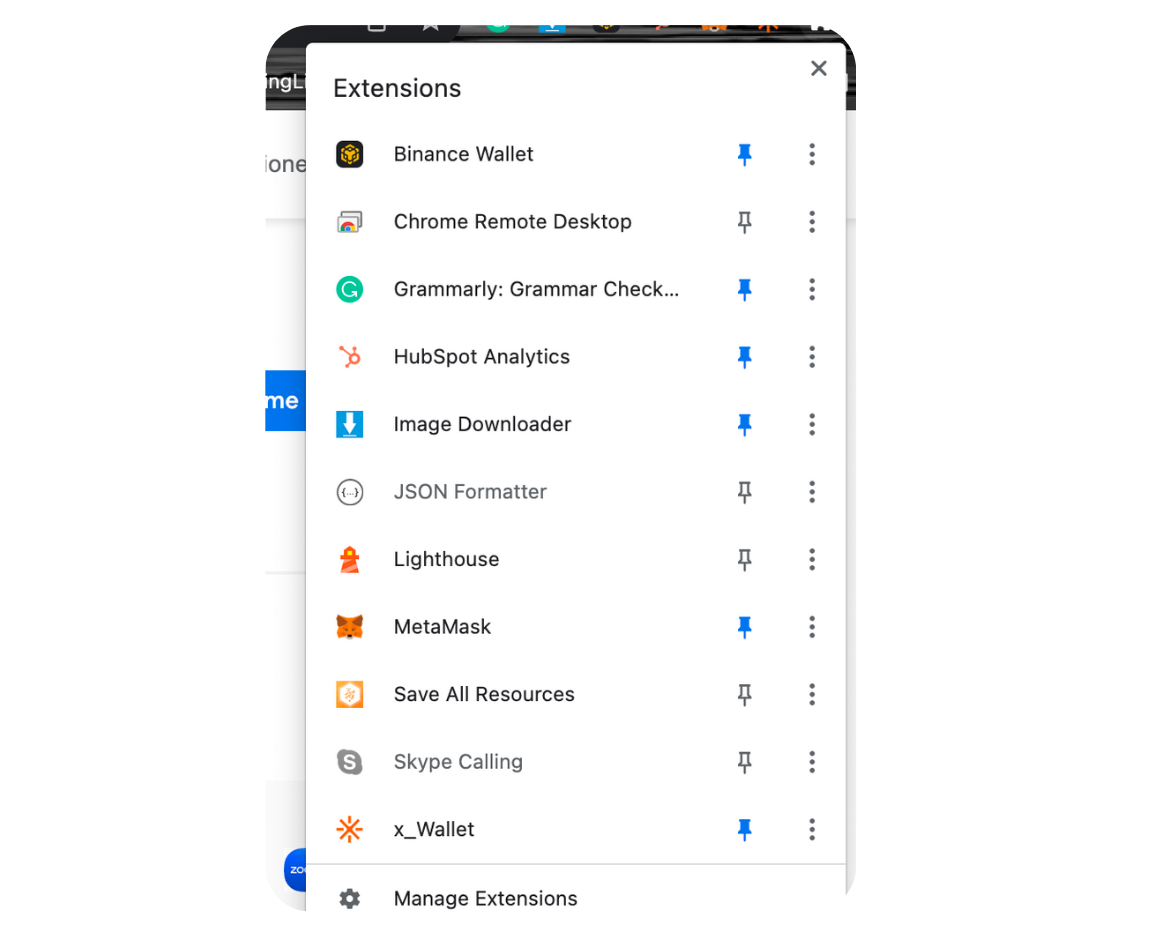
Step 4. Pin the XWallet to the toolbar
Locate the "extensions" icon in your Chrome browser and click on it.
Find ‘x_Wallet’ in the list of extensions and click the pin icon to add the XWallet to your toolbar for easy access in the future.
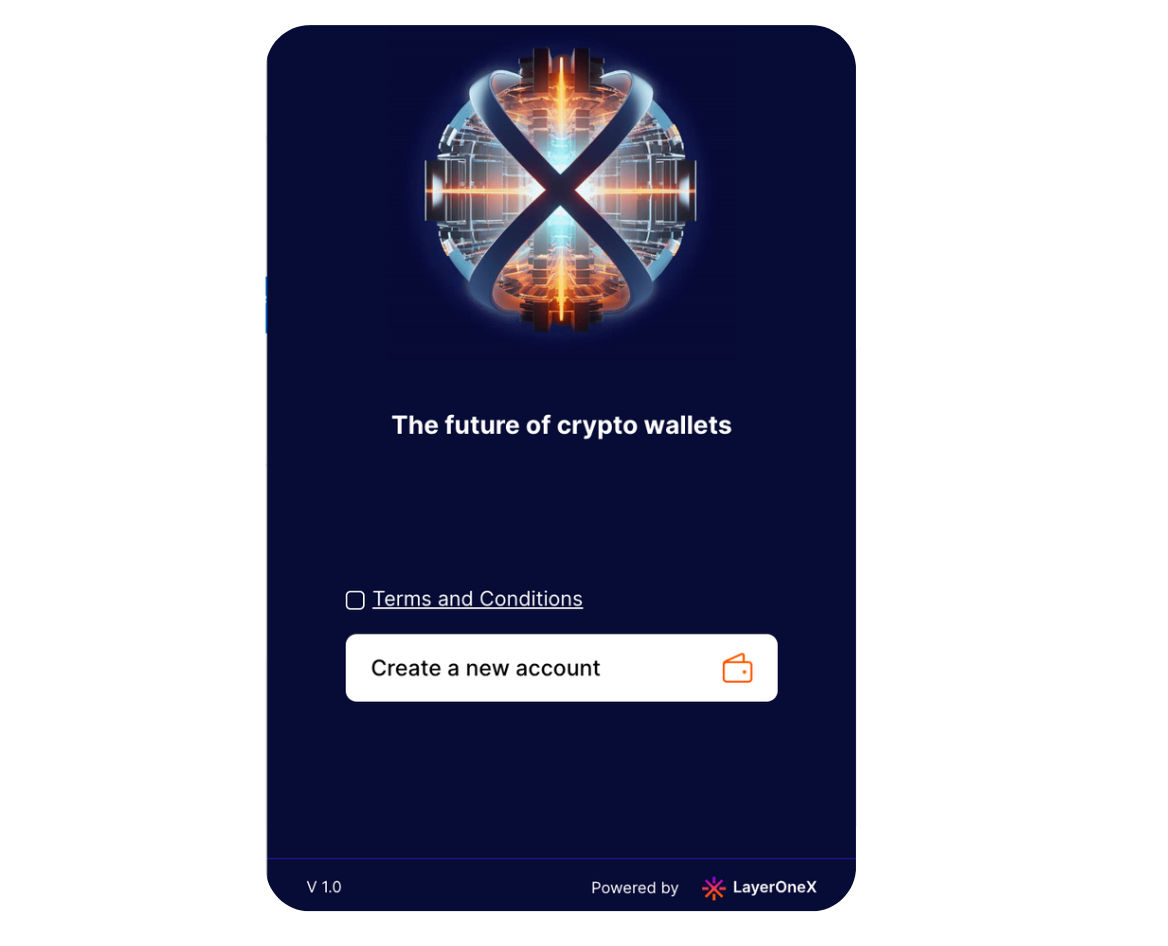
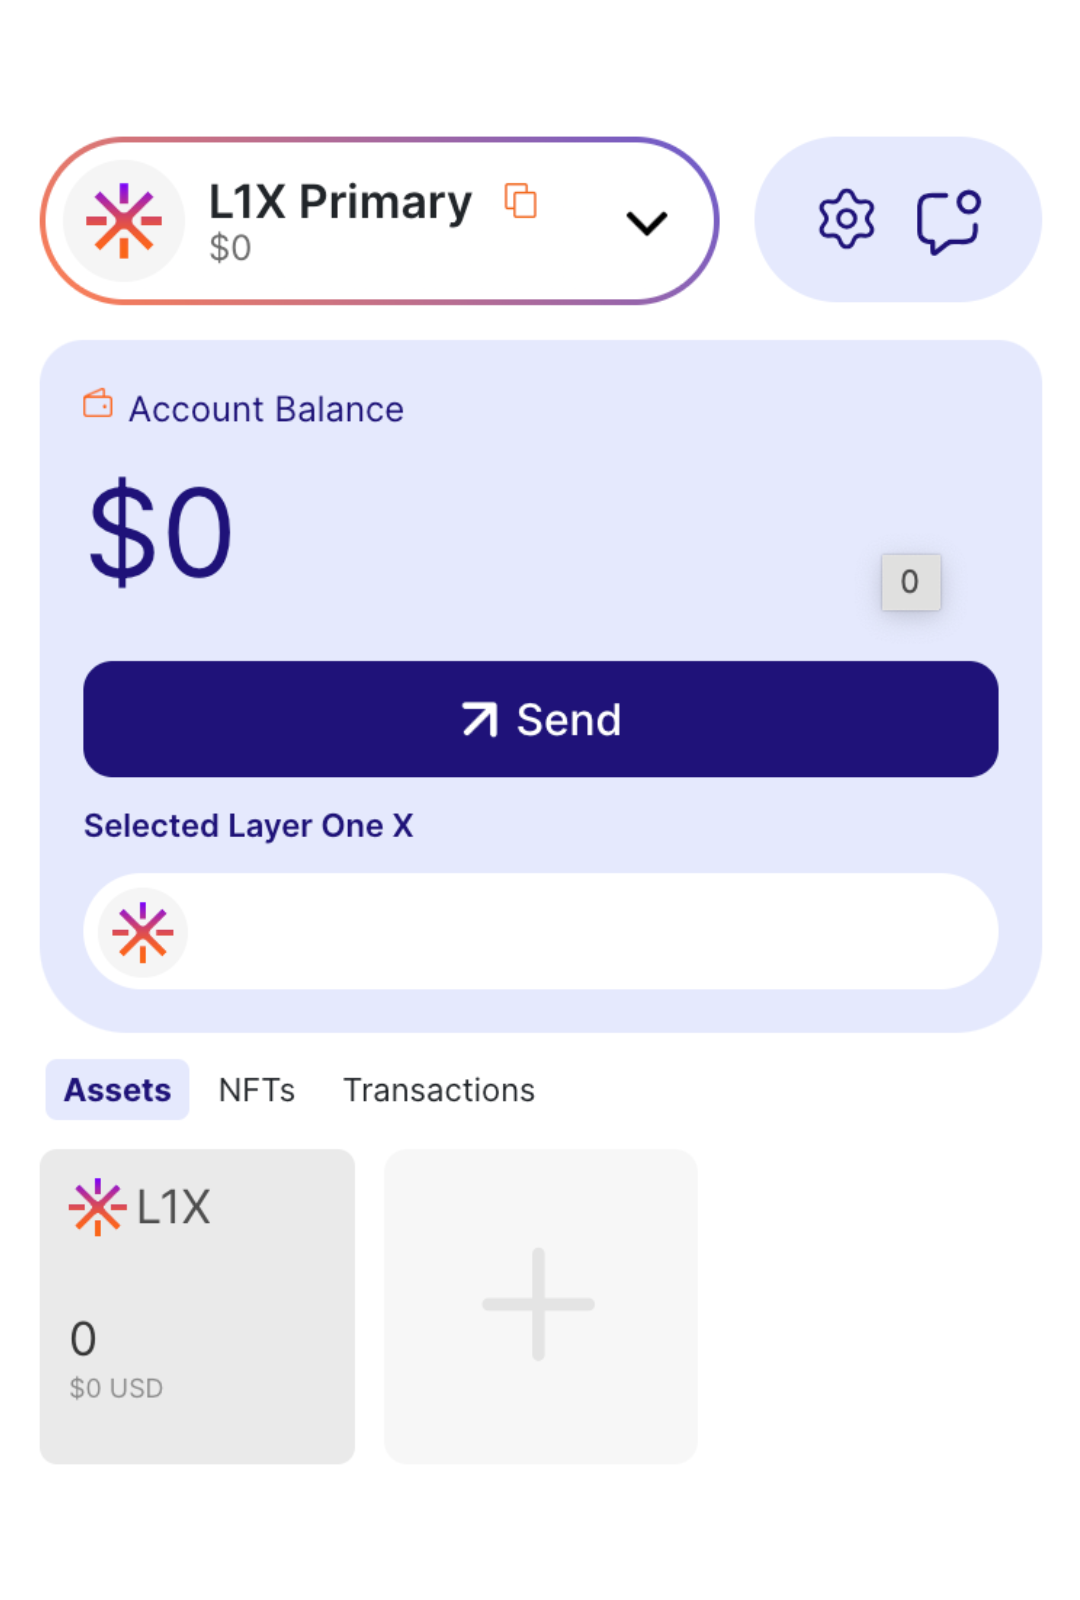
Step 5. Create your XWallet
Click on the XWallet icon in your toolbar and accept the terms and conditions.
Create a new account by following the on-screen instructions.
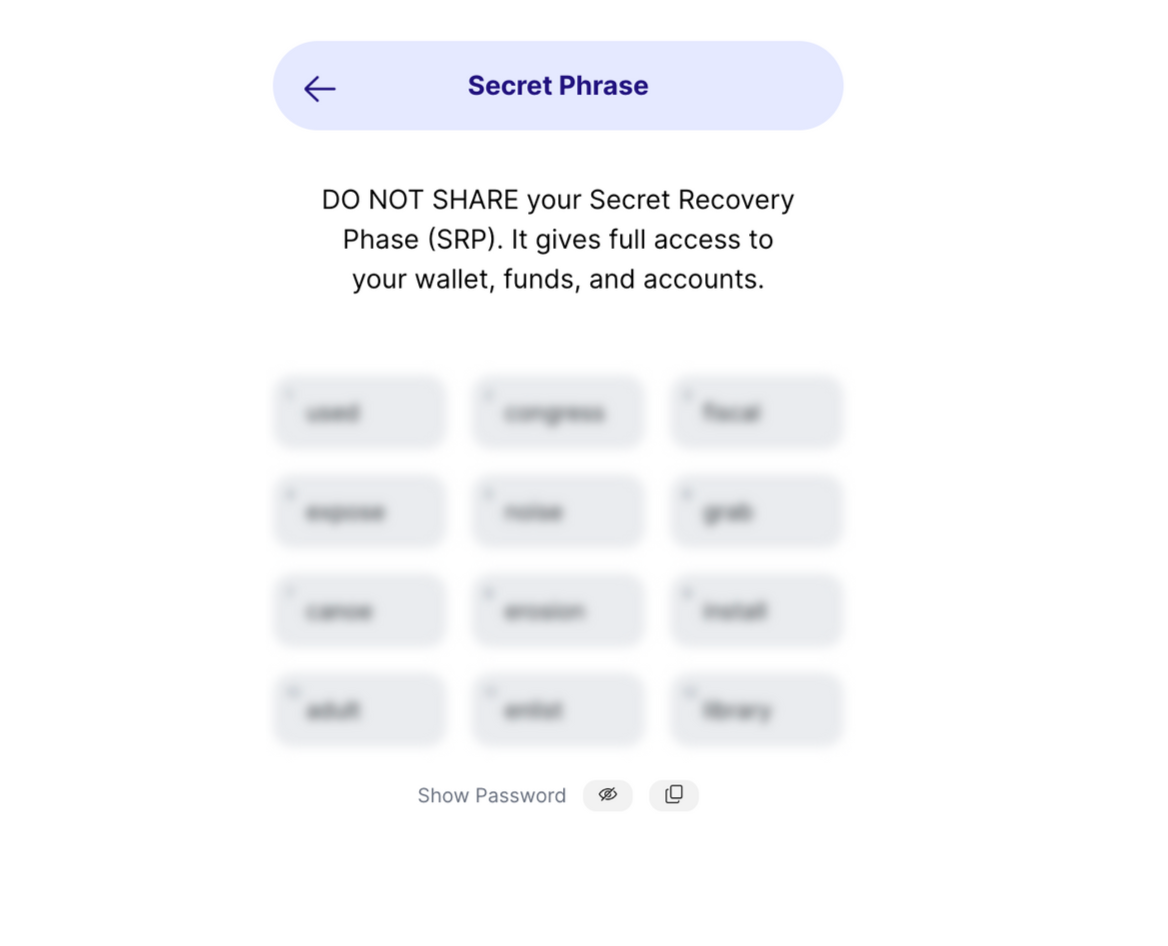
Step 6. Note your XWallet's Seed phrase
Copy the Seed Phrase provided and store it securely. Lost seed phrases cannot be recovered and can result in a loss of access to your wallet.
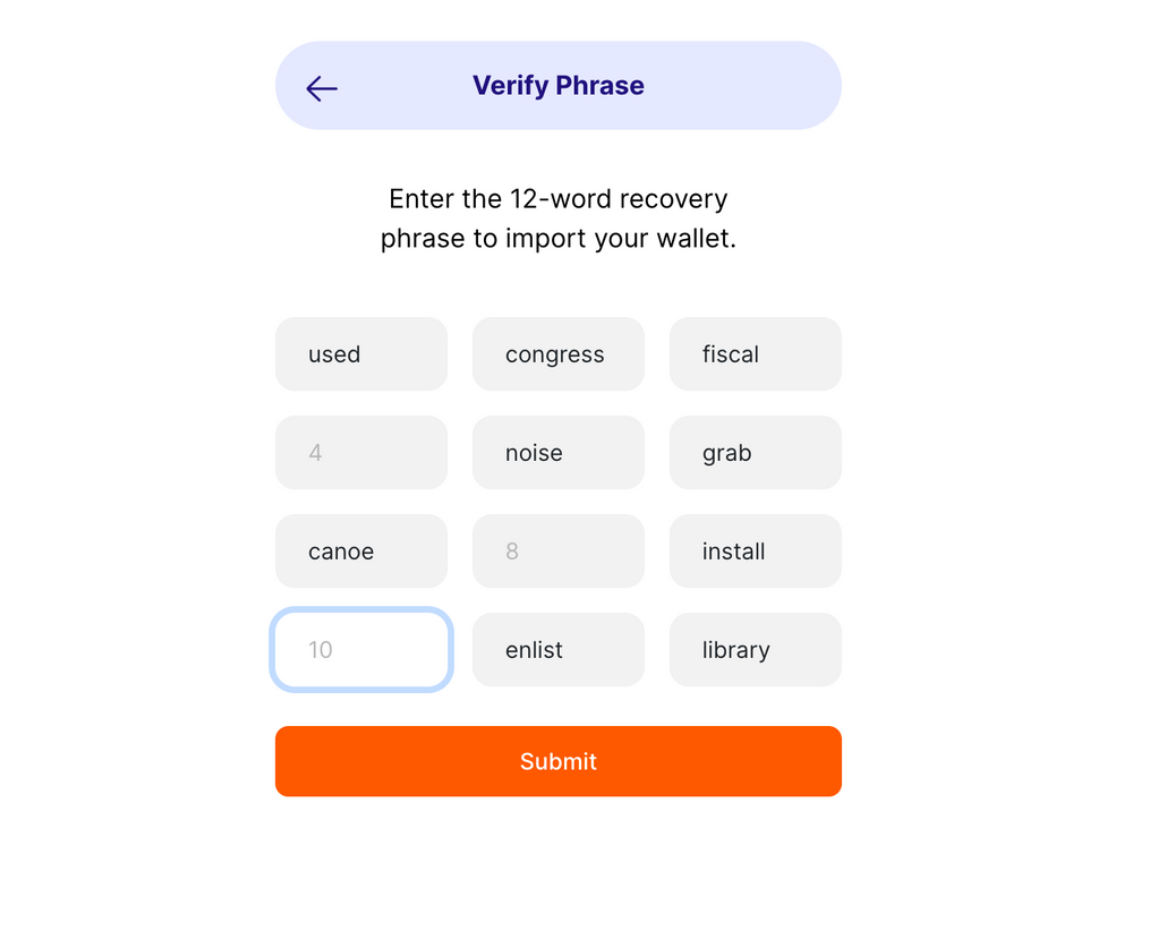
Step 7. Verify your XWallet's Seed phrase
To ensure you've accurately copied the Seed Phrase, type it into the text field on the next screen.
Click 'Submit' to verify.
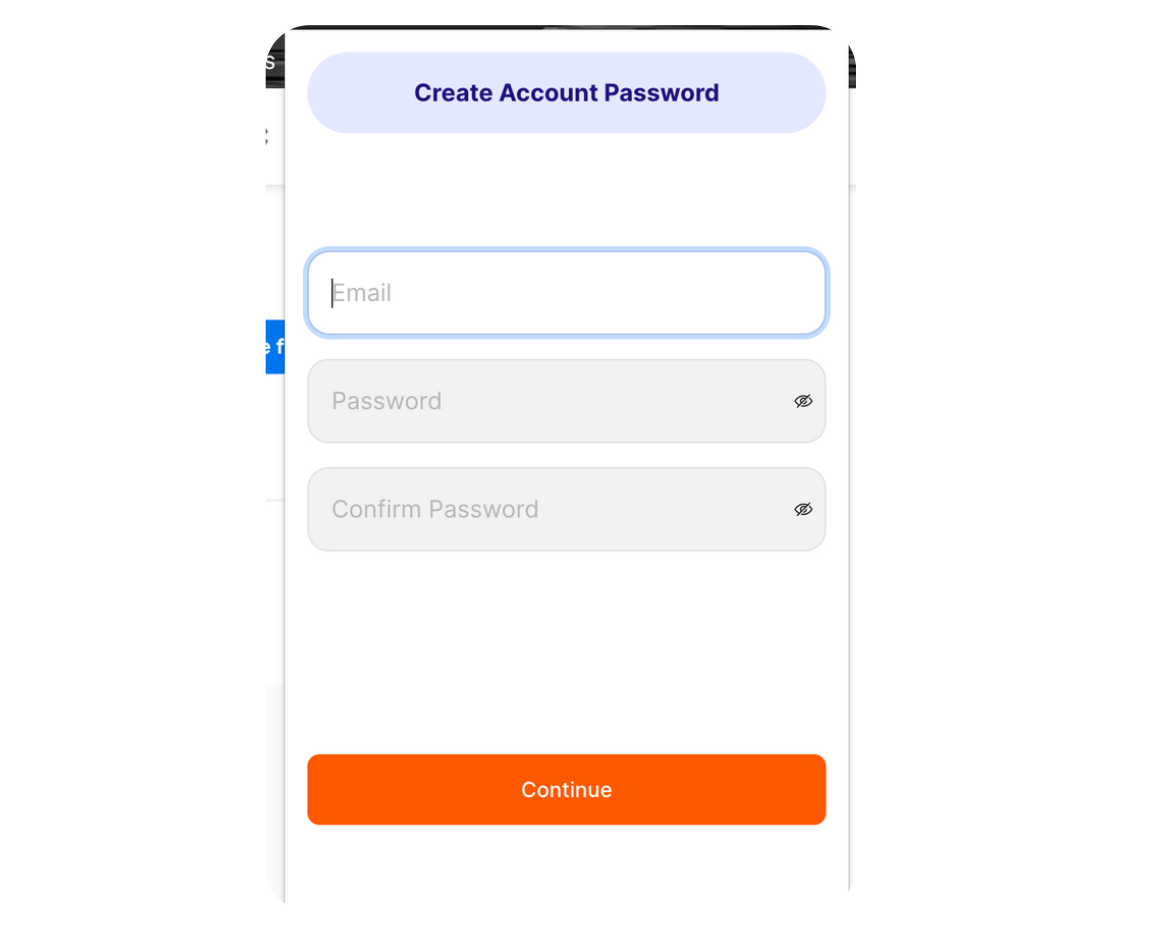
Step 8. Create an account password
Create a strong password to secure access to sensitive information within your XWallet.
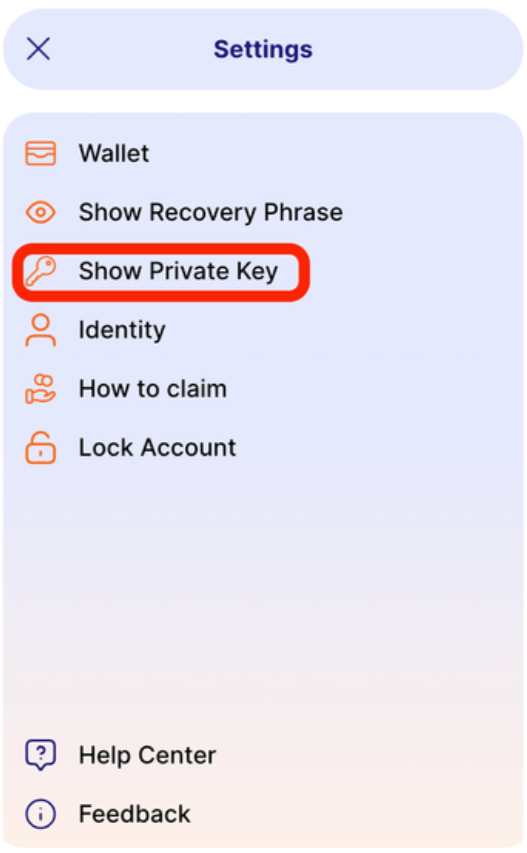
Step 9. Store your private key for each account to be able to access your XWallet accounts incase you accidentally uninstall it.
Step 9.1. Click on the 'Settings' icon in the right corner.

Step 9.2. Select 'Show Private Key'
Step 9.3. Enter password as you used in Step 8.
Step 9.4. Copy your Private Key and store it in a safe location.
Step 10. Congratulations! You have created your XWallet.
If you want to import your MetaMask wallet address into your XWallet to be able to see your L1X assets that have been purchased using MM (Usernames, for example), you can follow the instructions on the Video below.


